The
Combat
of Sabugal
3rd April 1811:
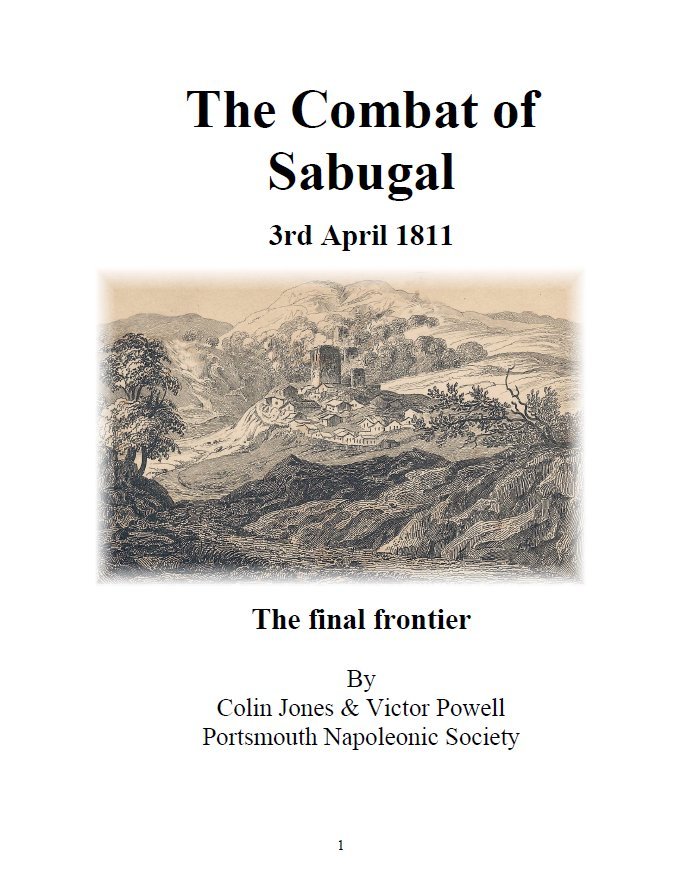
“One of the
most glorious that British troops were ever engaged in”. Wellington.
When Marshal
Massena’s invasion of Portugal ended in April 1811, the previous eight months
had presented a squalid and systematic devastation of a country’s fortitude and
well being. Napoleon had set his general an impossible task, omitting any
succor, blindly ordering a march into a land whose adversary was more than
prepared for the onslaught of a marauding army. Neither, Napoleon nor Massena
could of ever foreseen Wellington’s plans in case of such attack.
For nearly a
year the defensive lines of Torres Vedras had been under construction and the
tightly knitted intelligence blockade had amazingly rendered the whole thing a
complete secret. Wellington had said that the French could not turn him out of
Portugal with less than 100,000 men and Napoleon had supplied Massena with only
65,000.
Nevertheless, when the French Marshal came up against the lines on the 11th
October 1810, he had already succeeded in outflanking the Allied army at Bussaco
and had pushed the bulk of the army to the lower environs of Lisbon.
In short,
The Duc de Rivoli thought he was doing quite well despite the set back of losses
he had incurred at the Battle of Bussaco on the 28th September.
To the utter
surprise of the entire French army, the line of defensive works that now lay
between them and the success of ‘driving the leopard into the sea’, reared
itself as a formidable and impregnable row of forts, redoubts and sub-joined
walled firing platforms.
There were
three lines of 153 emplacements in total and the first two lines stretched from
the Atlantic coast to the Tagus shoreline, effectively cutting off all access to
Portugal’s southern peninsular. In reality, the capitulation of Lisbon was now
out of the question and Massena began to make preparations for the coming
winter. Eventually he abandoned the offensive for the defensive and concentrated
his winter cantonments in a triangle with his three Corps within a twenty mile
distance of each other. The ‘scorched earth’ policy adopted by all the armies of
this time meant that Massena’s troops lay in a barren land wrecked by the
ravages of war, with little or no provisions to feed an army of this size and
many diarists and historians alike have written about the inevitable scenes of
despair.
Incredibly
the French Marshal held out all winter against immeasurable odds, but on the 3rd
of March 1811, Massena issued the orders for a general retreat and Wellington
resolved to follow in his wake. There were numerous clashes between the allied
vanguard and the French rear as they made their exit from Portugal to their
nearest garrison at Cuidad Rodrigo on the central frontier of Spain. The action
at Sabugal was the last of these combats in which both sides displayed a
sanguinary determination to win.
Fought in
torrential rain and heavy fog, fraught with difficulties and combined
confusion. The heavily outnumbered victors struggled against an exhausted and
demoralized enemy that had once exhibited the epitome of a Napoleonic field
army, in a war that was later to become known as the Spanish Ulcer. Eyewitness,
Sir Harry Smith marched over the battlefield the following morning and wrote in
his memoirs:
“Oh, you
Kings and usurpers should view these scenes and moderate ambition!”
Combat
of Sabugal.
Wellington’s
plan for the eviction of the invading army from Portugal was quite simple.
By the
beginning of April, Massena’s army lay along the line of the river Coa, only a
day’s march from the Spanish frontier. The 9th Corps in the north,
formed the extreme right flank and was in the vicinity of the fortress of
Almeida, the 6th Corps was in the centre, the 2nd Corps at
Sabugal on the extreme left flank and the 8th Corps was considerably
to the rear. Wellington chose to turn the French left by launching the Light
Division, around the back of Reynier’s 2nd Corps who were posted on
some heights behind the town.
The whole
exercise was to be supported by a frontal assault using Wellington’s four
remaining Divisions (1st,3rd,5th&7th)
Unfortunately, the turning column, crossed the river too far to the north and
instead of coming round the back of Reynier’s left they hit the enemy full in
the flank. Secondly, the leading brigade of the Light Division became separated
from the rest of the division and were, for the best part of the battle, without
any support at all.
The reason
for all this mis-management, was mainly caused by the weather and bad
leadership.
The
morning’s march began in heavy mist only clearing about half way through the
combat, when a brief spell of fine weather was again abruptly terminated by a
deluge of rain. Obscured visibility meant that none of the commander’s could
really see what they were doing or where they were going.
The whole
event was again marred by the inconsistency’s of their commander, Sir William
Erskine, who had taken temporary command of the Light Division following Robert
Craufurd’s home leave. Harry Smith’s description of the man is far from
complimentary; “a near- sighted old ass.”
Sir William
made three possible fatal blunders on the day, he ordered the Light division to
cross the river before the remainder of the army were in their designated
positions.
Secondly,
when the 1st brigade became embroiled with the enemy and were in a
perilous situation, he ordered the 2nd brigade not to advance in
their support.
Thirdly,
both these orders were sent blind as Sir William, who was with the cavalry in
the rear, was scouring the river for a suitable place to cross and did not enter
the field of battle until it was all over. Many have said that if it wasn’t for
the remarkable quality of the Allied contenders and the fact that Brigadier
Drummond, the commander of the 2nd brigade, who ignored Erskine’s
order to hold, the day could have easily ended in disaster.
Nevertheless, despite the obvious difficulties Drummond’s brigade did eventually
come to the aid of the 1st Brigade and the 3rd & 5th
Divisions appeared on the scene in the nick of time rendering Reynier’s position
untenable. He therefore was compelled to call a general retreat.
Wellington
wrote on the 9th April; “Although the operations of the this day
were, by unavoidable accidents, not performed in the manner in which I intended
they should be, I consider the action that was fought by the Light Division, by
Colonel Beckwith’s Brigade principally, with the whole of the 2nd
Corps, to be one of the most glorious that British Troops were ever engaged in.”
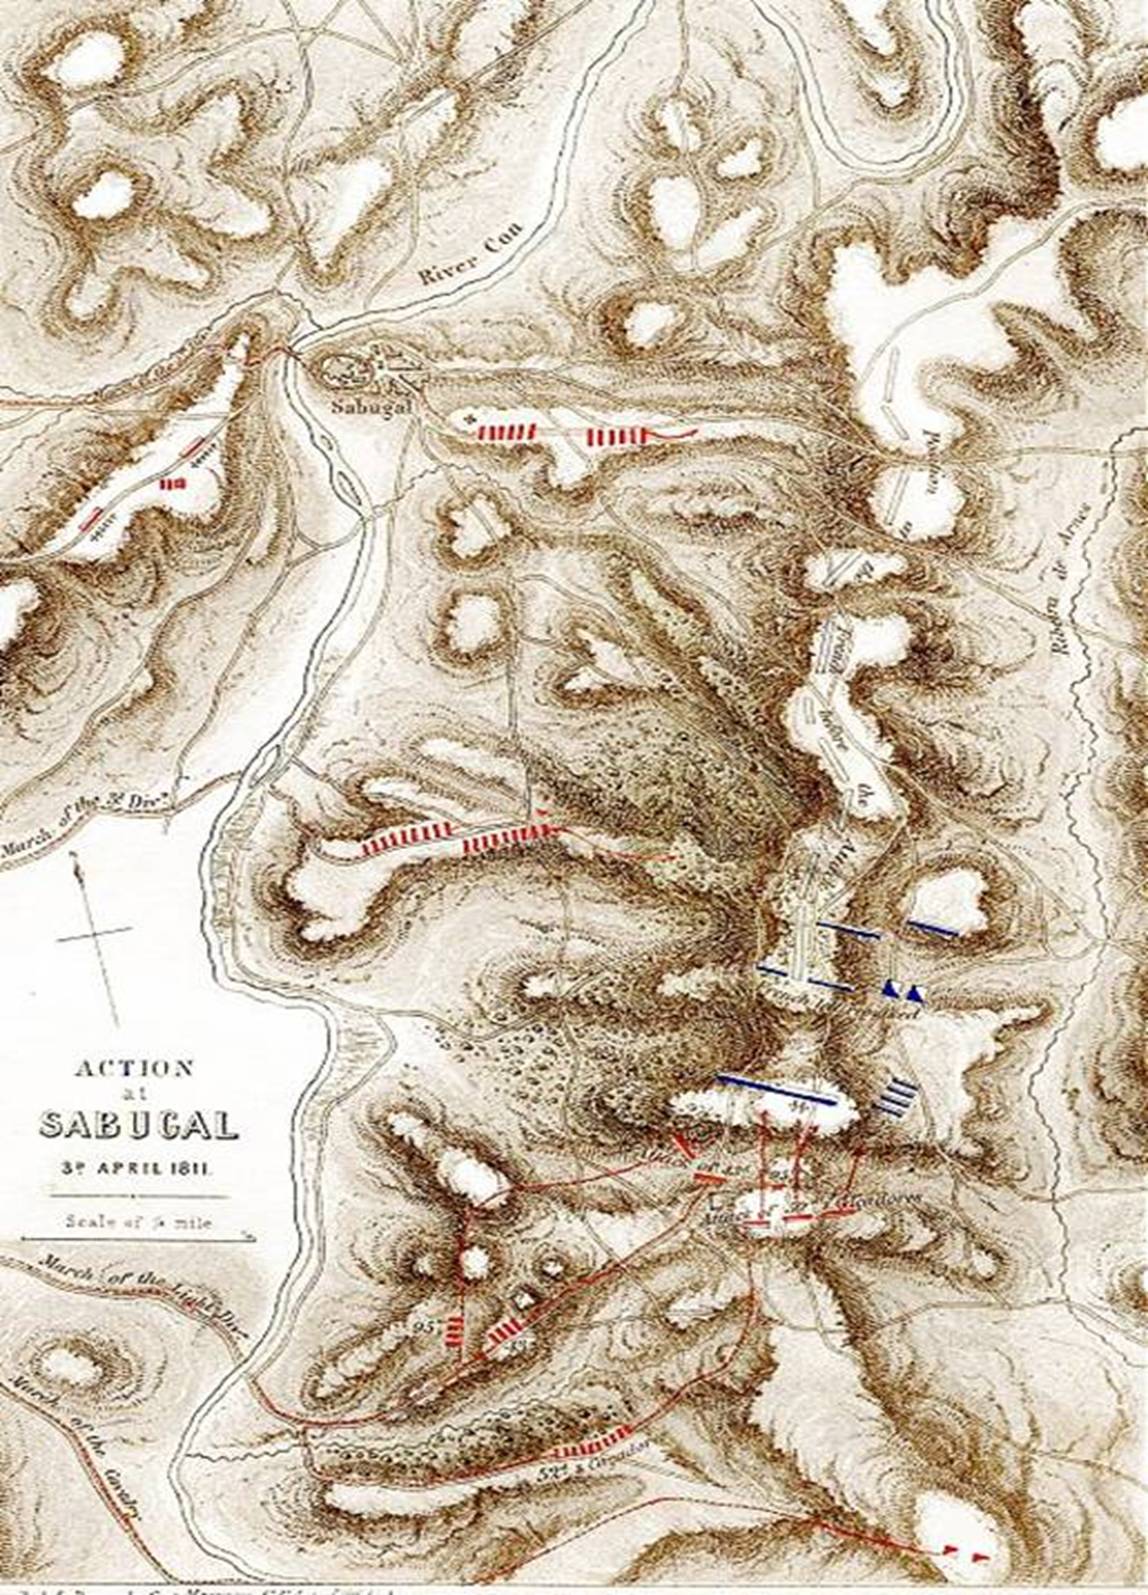
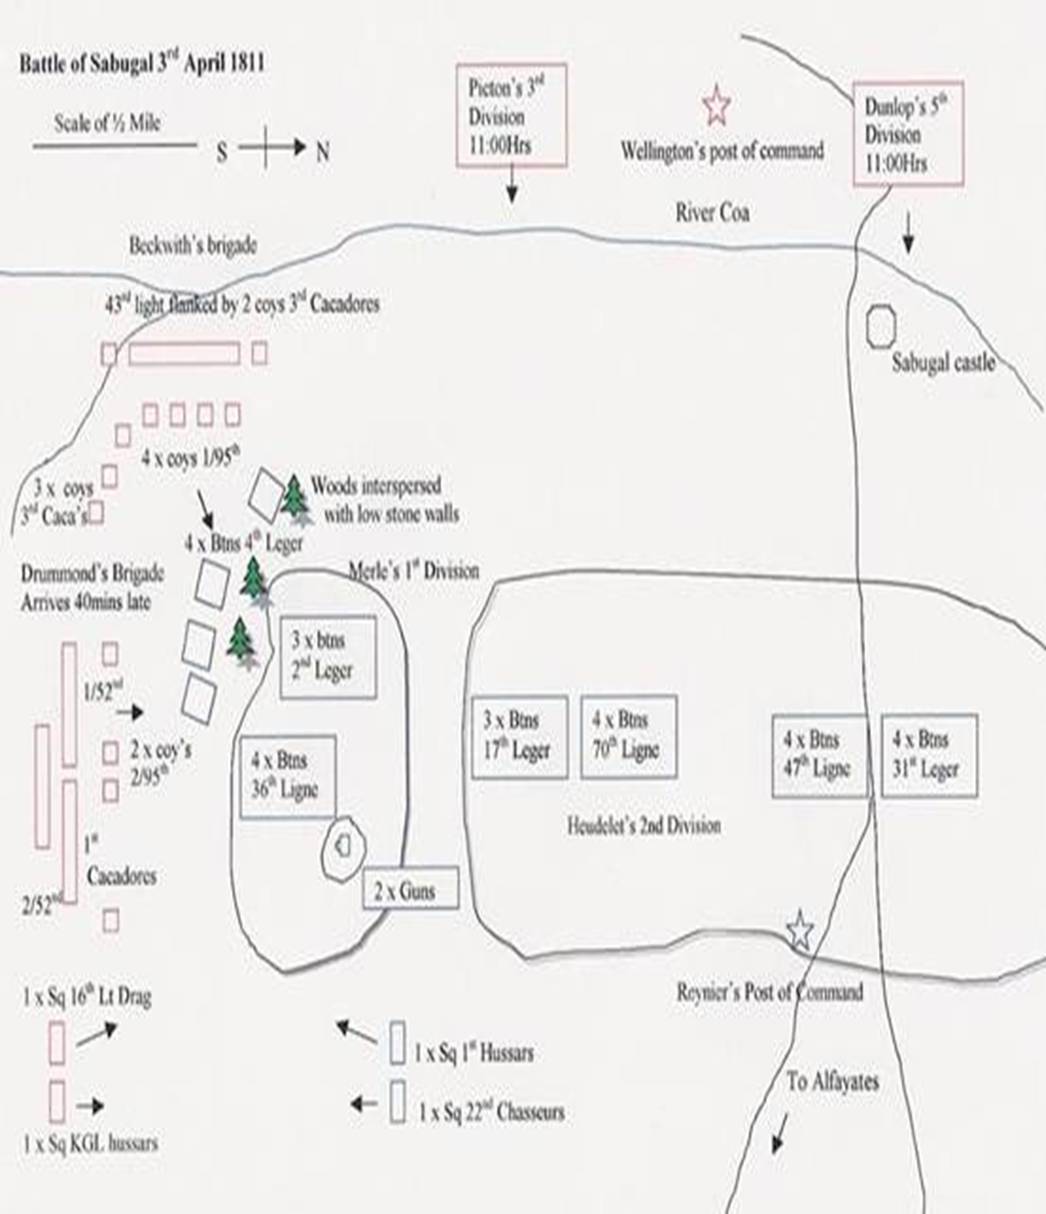
Map of the action.
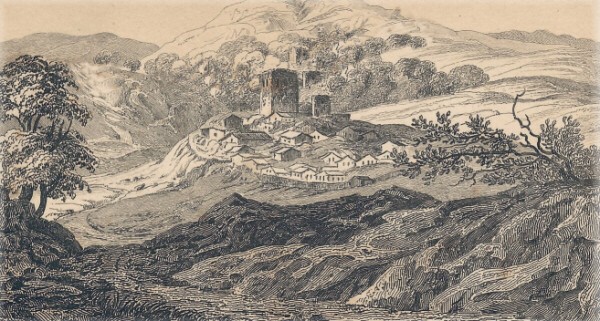
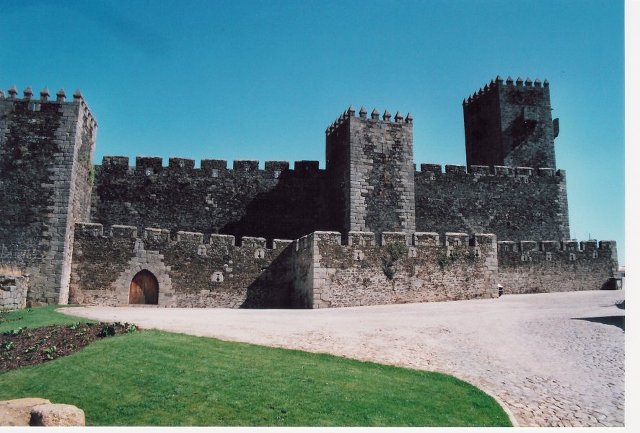
The Castle at Sabugal today.
Sequence
of events.
Beckwith’s 1st
Brigade crossed the river around 10:00hrs and immediately came into fire with
some French pickets who were easily driven off. However this alerted the four
battalions of the 4th Leger from Merle’s 1st Division who
quickly formed column of divisions on the forward slope of the hill. The
skirmish line was weak and was quickly driven in by the companies of the 1/95th
and 3rd Cacadores. Merle advanced down the hill and drove in
Beckwith’s skirmishers but found that the density of his units were a good
target for the Allied firepower and had to withdraw after considerable loss.
Beckwith
followed up the withdrawal, through a small chestnut wood and onto the crest of
the hill. Here, he was confronted by the remainder of Merle’s division, seven
battalions of the 2nd Leger and 36th Ligne. The early
morning mist had now turned into rain and much diminished the firepower on both
sides but the French having a 2:1 superiority of numbers forced Beckwith’s men
back down the hill and into some stone walled enclosures. Sergeant Anthony
Hamilton of the 43rd Light infantry observed: “In this charge, twenty
– seven of my own company were cut down, thirteen of whom were killed, and the
others, myself among the number, wounded. Under these circumstances the leading
battalion would probably been sacrificed, had not Colonel Beckwith, with great
promptitude, retreated behind some stone enclosures, which enabled him to
maintain his ground.”
For
a time the rain ceased and after some heavy exchanges of musketry the French
fell into disorder and retired back to the crest to reform.
The
Brigade, went up the hill a second time in pursuit but Merle had positioned two
guns which could now come into play on Beckwith’s right flank.
Colour
Sergeant Thomas Benjamin Garrety of the 43rd describes the situation:
“Fortunately, Reynier, little expecting to be attacked, had, for the convenience
of water, placed his principal masses in the low ground, behind the height on
which the action commenced; his renewed attack was therefore uphill; yet the
musketry, heavy from the beginning, now increased to a storm. The French mounted
the acclivity with great clamour; and it was evident that nothing but the
desperate fighting could save the regiment from destruction. Captain Hopkins,
commanding a flank company of the 43rd, immediately ran out to the
right, and with admirable presence of mind seized a small eminence close to the
French guns and commanding the ascent by which the French troops were
approaching. His first fire was so sharp that the assailants were thrown into
confusion; they rallied, and were again confounded by the volleys of this
company: a third time they endeavored to form an attack, when Hopkins, with a
sudden charge, increased the disorder.”
The
situation was made worse by the re–entry of the rallied 4th leger who
began to come in on the left and two squadrons of cavalry were also approaching
from the right. Once
more the allies were forced back to the shelter of the stone walls.
Fortunately for Beckwith the 2nd Brigade now made an appearance and
came up to support the right flank. After a bitter struggle the French fell back
in disorder and the Light division regained the crest.
Map of
the action
Garrety
of the 43rd continues: “Beckwith, wounded in the head, and with blood
streaming down his face, rode amongst the foremost of the skirmishers, directing
all with ability, and praising the men in a loud, cheerful tone. I was close to
him at the time. One of our company called out, Old Sydney is wounded. Beckwith
heard the remark and instantly replied, but he won’t leave you: fight on, my
brave fellows; we shall beat them.
The musket
bullets flew thicker and closer every instant; but the French fell fast: a
second charge cleared the hill, a Howitzer was taken, and the British
skirmishers were even advanced a short way down the hill, when small bodies of
French cavalry came galloping in from all parts, and obliged them to take refuge
in the main body of the regiment.”
“ The
English line was now formed behind a stone wall above; yet one squadron of
Dragoons surmounted the ascent, and with incredible desperation, riding up to
this wall, were in the act of firing over it with their pistols, when a rolling
volley laid nearly the whole of them prostrate. By this time however, a second
and stronger column of infantry had rushed up the face of the hill, endeavoring
to break in and retake the howitzer, which was on the edge of the descent, and
only fifty yards from the wall. But no man could reach it and live, so deadly
was the 43rd’s fire. One of my comrades, having previously passed the
howitzer, took a piece of chalk from his pocket, as he said, marked it as our
own, and we were determined to keep it.”
Reynier, had
he known right from the beginning, the size of his adversary, would of surely
sent the whole of his available force en masse a lot sooner and dispensed with
each individual attack as they appeared. Instead, he waited until Merle’s
infantry were almost in flight before calling up Foy’s brigade of Heudelet’s
Division.
All hell
broke loose again, the seven battalions of the 17th Leger and 70th
Ligne joined the fight for the summit, the two French squadrons charged again
upon the flank of the 52nd and a British squadron of the 16th
Light Dragoons now entered into the melee.
At this
moment the weather cleared again and Reynier caught sight of the two British
divisions advancing from the west. The 5th division were crossing the
bridge at Sabugal and Picton’s 3rd Division were rushing in upon the
flanks of the 17th and 70th.
Reynier’s
position was now hopeless and he ordered a general withdrawal. The 47th
Ligne and the 31st Leger were the only fresh troops that had missed
out on the earlier fighting and these regiments were used to cover the retreat
of the broken 2nd Corps.
A full
pursuit by the allies was out of the question because of the bad weather.
Nevertheless, A squadron of the 1st KGL hussars fell on the French
transport column and captured the private baggage of Reynier and General Pierre
Soult.
The
following day Massena’s army marched back across the frontier to Cuidad Rodrigo
and would not see another major action for a month – Fuentes de Onoro on 3rd
May.
Losses and conclusion.
The total
loss of the French during the combat was 61 officers and 699 men.
Sir Charles
Oman notes that the proportion of officers to men lost would normally be 1:20,
but at Sabugal it was 1:11. and suggests that the disproportion in the
commissioned ranks was due to the gallantry with which they threw away their
lives in bringing up to the front the shaken and demoralized soldiers, who could
not face the English musketry.
Oman also
states that one gun and 186 unwounded prisoners were taken.
This
conflicts wildly with some of the Allied accounts of the action, some who
purport that the French casualties and prisoners taken were anything up to 1500
men. I have rested on Oman’s figures as they seem to be more realistic.
The Allied
casualties are well documented and differ little between sources. Of the total
of 179 men no less than 143 were from the Light division.
80 of these
belonged to the 43rd regiment and as Oman remarks; It is Sufficiently
clear from these figures who had done the fighting this day.
The
individual losses for each regiment from both sides can be found on the orders
of battle. One must remember that the whole battle lasted just one hour.
The French
general, Baron Thiebault gives the reason for Reynier’s failure at Sabugal and
blames him for upsetting Massena’s plan of evacuation; “It might have been
avoided if General Reynier had had faith in Massena’s foresight; but in the
conviction that he had in front of him only a fraction of the Anglo-Portugeuse
army, he let himself be brought to an engagement with nearly the whole army, and
luckily was not aware of it till about 11 am, when the fog cleared off and he
found himself outflanked and attacked in front by forces which he could not
resist. Unluckily, too, the 2nd Light infantry and the 36th
of the line, having won a momentary advantage, gave way to their impetuosity and
lost more than they ought to have done.”
The fact
remains that Reynier did not know who he was facing and could of inflicted a
severe blow on the Allies before the rest of the army came up.
Regardless
of the reasons why or what Reynier should or should not have done, the battle
will always be remembered in history because of the unbelievable gallantry of
Beckwith’s 1st brigade, and in particular the 43rd
Regiment.
It seems
fitting to conclude on a quote by an eyewitness from that regiment, Thomas
Garrety, who gives a brief but revealing insight into the minds of the men who
fought on that day.
“I scarcely
ever before saw such determined firmness in our troops. It amounted almost to
invincibility. During the action there was through our ranks to be observed a
fierce and terrible anger, before the breakings forth of which the enemy quailed
and fled. Our fire was given with singular exactness and rapidity. This fine
conduct arose partly from a sense of extreme personal danger, - for of that not
a man was insensible; and partly from the desire which I believe prevailed every
breast, of properly supporting the officers engaged. Among others, I had been
unusually excited, and had dealt out wounds and destruction with an unsparing
hand. In endeavoring to
reach
the enemy, all concern for my own preservation was forgotten.”
Battle of Sabugal. 3rd April
1811.
Order
of Battle
Allied
Order of Battle.
Maj -Gen Sir W. Eskine.
Light Division: (Beckwith's Ist Brigade).
Total number
Losses
1/95th Rifles. (4x Companies).
254 17
1/43rd Light. (10 X Companies).
754 80
3rd Cacadores. (5 x
Companies). 510 8
Light Division: (Drummond' s 2nd Brigade ).
2/95th Rifles. (4x Companies).
357 3
1/52nd Light. (10 X Companies).
635 23
2/52nd Light. (Kept in reserve and did not take part in the action.)
1st Cacadores. (5 x Companies).
510 3
1st KGL Hussars. (1 x Squadron).
120 2
16th Light Dragoons. (1 x Troop ).
50 4
General Picton. 3rd Division.
Comprising of: 2/5th, 1/45th, 5/60th, 2/83rd, 1/88th, 2/88th & 1/94th.
Notes: Picton's troops did not enter the battle until it's closing stages.
The total losses for this Division were only 25 and many of these casualties
must of taken place during the pursuit of the retreating enemy. The 5th
Division under General Dunlop entered Sabugal without any loss whatsoever
French Order of Battle.
Reynier's 2nd Corps.
Merle's Ist Division.
Brigade Sarrut:
2nd Leger. ( 4 x Battalions
). 350 per Btn 91
36th Ligne. (4 x Battalions).
309 per Btn 96
Note: Orders of battle for this brigade differ from recorded accounts of the
battle apparently the 2nd Leger or the 36th Ligne had one absent
battalion and could only muster three battalions on the field that day. See the
2nd Leger strength on the map above.
Brigade Graindorge:
4th Leger. (4 x Battalions).
275 per Btn 8
Heudelet's 2nd Division.
Brigade Foy:
17th Leger. (3 x Battalions ).
303 per Btn 177
70th Ligne. ( 4 x Battalions ).
318 per Btn 244
Brigade Arnaud:
31st Leger. (4 x Battalions).
418 per Btn 10
47th Ligne. ( 4 x Battalions ).
415 per Btn 8
Cavalry Brigade: P. Soult.
1st Hussars. (1 x
Squadron). 80
12
22nd Chasseurs. (1 x Squadron). 80
16
Note: This was the only cavalry that could be brought into line on the day,
although the
remaining Regiments of the Brigade, (including the 8th & 25th Dragoons, and
Hanoverian Chasseurs), lost a total of 12 casualties during the retreat
Divisional Artillery:
2 x 5:5 Howitzer cannons. 20
Gunners + riders. 1 x gun. + 10 men.
Bibliography
Colour Sergeant Thomas Benjamin Garrety: Memoirs of a Sergeant late in the 43rd light infantry regiment Ken Trotman reprint 1998.
Sergeant Anthony Hamilton: Hamilton’s campaign with Moore and Wellington. Spellmount reprint 1998.
Battle plan map taken from: Historical record of the fifty – second regiment. W.S.Moorsom. 1860
Contemporary drawing by Lieut-Col Leith Hay. A narrative of the Peninsular war. 1834.
Sir Charles Oman: A history of the Peninsular War. Greenhill reprint 1996.
Autobiography of Lieutenant – General Sir Harry Smith. 1902.
The Memoirs of Baron Thiebault. Worley publications 1994.
Major George Simmons: A British Rifleman. Greenhill reprint 1986.
Selections from the Dispatches and General orders of Field Marshal The Duke of Wellington. Lieut – Colonel Gurwood. 1841.
Captain
John Dobbs. Recollections of an Old 52nd Man. (Excellent
source for the dispute between the
43rd & 52nd concerning the
captured gun). Spellmount
reprint 2000.
More pictures from around
Sabugal:

Also
on the excellent
Napoleon Series: Virtual Battlefield Tours site as a
virtual battlefield tour with a lot
more there worth looking at!
First published
Portsmouth
Napoleonic Society Sept
2000
The Portsmouth Napoleonic Society